
We’ve tried to make the process for creating a challenge as
simple and intuitive as possible, while still providing robust options for
customizing the challenge to suit your unique needs/preferences. Hopefully it is pretty straightforward, but
we thought a quick tutorial on how it works would be helpful as a reference.

There are 3 options available:
- Create from Template – To jump-start the process, start from one of our templates we’ve created. You can still customize everything about the challenge, this just pre-populates many of the details for you.
- Clone Challenge – Select this option if you want to create a similar challenge to one you’ve previously created. For instance, if you have a weekly challenge to predict the score for your favorite football team. Once again, you can still edit/customize everything, this just pre-populates the details based on your previous challenge.
- Start From Scratch – Select this option to simply start from a blank slate.
Once you’ve decided on this option, give your challenge a name and description to get started.

Now that you’ve started the process, you have several tabs where you can set the options for your challenge:

- Challenge Summary – You can edit the Name and Description for the challenge here. You can also Delete the challenge if you no longer want it or want to start over.
- Challenge Settings – This tab has several general options for your challenge:
- Category – This option lets users more easily find Public challenges on the Join Challenge page, which includes a category filter
- Privacy – Private (“Only those I invite”) challenges have a unique URL that can be given out to anyone you want to join the challenge. This is the only way to access your challenge. Public (“Everyone and their Mom”) challenges will show up to anyone on the site via the Join Challenge tab.
- Deadline – This option can be used to automatically close the challenge to new participants and lock all of the entries so that they can no longer be edited. If no deadline is selected, the challenge can be closed manually whenever you wish.
- Challenge Questions – Use this tab to build the content of your challenge. Just select from the question types on the left and drag/drop to the preview area on the right. Then click on any question to customize the content/settings for that particular question.
- Launch – Once your challenge is ready, use this tab to launch it. Once launched, the challenge status changes from Under Development to Open, and participants can access and take the challenge.
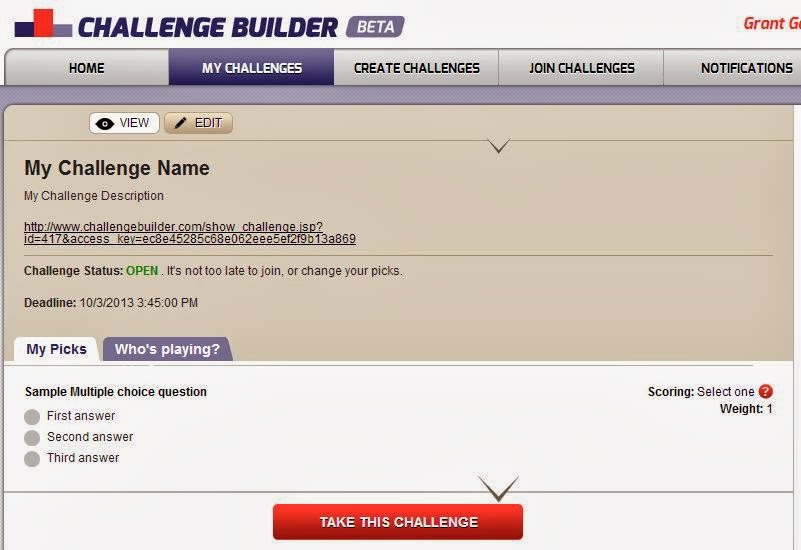
Once your challenge is launched, you will see options at the
top to View or Edit.

The Edit page is only available to you, as the challenge
creator. The View page is what all
participants will see, and this is the URL you should give out to anybody to
let them join your challenge. Simply
copy and paste this URL to share with others, or use our social plugin to send
it out via Facebook, Twitter, etc.
When your challenge has reached the deadline you set, it
will automatically change from Open to Closed status, and no new participants
can join or edit their picks. If you
didn’t set a deadline, simply go back to the Edit page and manually change the
status to Closed.
Once the challenge is closed, you will see a new option at
the top to Score the challenge.

When you are ready to score it, select this option and enter
the correct answers as if you were taking the challenge. The challenge will be automatically scored,
and will now display the correct answers and standings for all
participants. These are visible from the
same View Challenge URL used to join the challenge. Participants should also receive an automated
email telling them the challenge is scored and providing a link back to that
challenge to view the results.
Make a mistake scoring the challenge? Don’t worry, you can fix it. Just go back to the Edit view, and change the
status from Scored to Closed. Hit
Save. You will then have the Score page
available again, and can repeat the same process, fixing whatever mistake you
made.

Can’t remember the URL for a challenge you created? Don’t worry, you can easily find it by
clicking on the My Challenges tab. Every
challenge you create or join can be found here.
And that’s pretty much it!
Go forth and create challenges!
- The Challenge Builder Team
- The Challenge Builder Team
No comments:
Post a Comment